


Blog
How to Install HF Radios in Vehicles Without Losing Your Mind
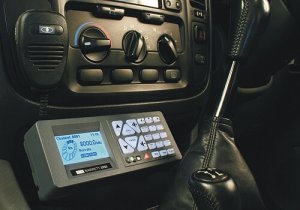
There is a very specific emotional timeline that accompanies every Mobile HF radio installation.
It starts with excitement. You’ve got the radio. You’ve got the antenna. You’ve watched a few videos. You feel capable.
Then comes the moment when half your dashboard is removed, trim clips are scattered across the floor, and you are staring at a firewall wondering why manufacturers make access so difficult. That is when the internal monologue begins.
Relax.
A proper Mobile HF radio installation is not about speed. It is about structure. It is about methodical steps, clear planning and understanding that if you slow down early, you avoid frustration later.
For Australian DIYers and vehicle owners, completing your own Mobile HF radio installation can be deeply satisfying. You gain independence, confidence and a system you understand inside out. But you only get that reward if you approach the project the right way.
This guide walks through a full-length, practical and realistic approach to Mobile HF radio installation — from mindset to final testing — without losing your sanity along the way.
Why Mobile HF Radio Installation Feels Bigger Than It Is
At first glance, a Mobile HF radio installation looks intimidating. The radio is larger than a UHF. The antenna is taller. The wiring is heavier. The power draw is higher.
Unlike basic accessories, a Mobile HF radio installation interacts directly with your vehicle’s electrical system and body structure. That responsibility can feel daunting.
But here’s the truth: a Mobile HF radio installation is simply a series of manageable tasks done in the correct order. When people struggle, it is rarely because the job is too complex. It is because they rush, skip planning, or underestimate grounding.
Approach your Mobile HF radio installation calmly and deliberately, and it becomes far more manageable than it first appears.
Step One: Think Before You Touch Anything
The difference between a smooth Mobile HF radio installation and a chaotic one is planning.
Sit inside your vehicle and visualise the entire system. Imagine where each component will live. Think about cable paths. Consider airflow and access.
During this planning stage of your Mobile HF radio installation, ask:
- Where will the main radio body be mounted?
- Where will the control head sit for safe operation?
- Where will the antenna mount for best radiation?
- How will power cables reach the battery cleanly?
- Where will grounding straps be required?
If you skip this thinking phase, your Mobile HF radio installation becomes reactive. Reactive installations create cable clutter, poor routing and unnecessary frustration.
Planning is not wasted time. It is the foundation of a stress-free Mobile HF radio installation.
Choosing the Right Home for the Radio Body
Every successful Mobile HF radio installation begins with proper placement of the radio body.
HF radios generate heat, especially during extended transmission. They also require solid mounting to withstand vibration on Australian roads.
Common mounting options in a Mobile HF radio installation include:
- Under front seats
- Behind rear seats
- In cargo compartments
- Inside canopies for touring setups
When deciding on placement, remember that your Mobile HF radio installation should allow airflow. Avoid sealing the radio inside plastic compartments with no ventilation.
A well-ventilated radio location ensures your Mobile HF radio installation remains reliable during long conversations or emergency use.
Running Power Properly: The Backbone of Mobile HF Radio Installation
If there is one area where DIYers must not cut corners during a Mobile HF radio installation, it is power wiring.
Your Mobile HF radio installation must run direct power from the battery using appropriately sized cable. This means:
- Dedicated positive cable
- Dedicated negative cable
- Proper fuses mounted close to the battery
Do not tap into accessory wiring. Do not rely on factory circuits not designed for high current draw.
A poorly executed power run weakens your entire Mobile HF radio installation. Symptoms include voltage drop, radio resets and reduced transmit performance.
Routing power cables through the firewall may require patience. You might need to remove panels. You might need to use an existing grommet or carefully drill a new passage.
Take your time. A solid power supply is the heart of your Mobile HF radio installation.
Grounding: The Make-or-Break Factor
Grounding is where many Mobile HF radio installation projects either succeed brilliantly or fail quietly.
Vehicles are not electrically uniform. Panels are bolted together. Hinges isolate sections. Paint blocks electrical continuity.
A proper Mobile HF radio installation addresses grounding deliberately.
You should:
- Ensure metal-to-metal contact at antenna mounts
- Scrape paint where grounding straps attach
- Bond body panels with braided straps
- Ground the radio chassis securely
- Bond exhaust and chassis sections if necessary
When grounding is handled correctly, your Mobile HF radio installation will operate cleanly and efficiently.
When grounding is ignored, noise appears, SWR fluctuates and frustration builds.
Grounding is not glamorous, but it is critical to a successful Mobile HF radio installation.
Antenna Placement: The Visible Commitment
Few parts of a Mobile HF radio installation feel as permanent as drilling for an antenna mount.
Whether you choose a bullbar mount, rear bar bracket or spare wheel carrier, your antenna placement directly affects performance.
During your Mobile HF radio installation, consider:
- Distance from roof racks or ladders
- Structural strength of mounting location
- Accessibility for maintenance
- Clearance from doors and panels
The antenna is the most visible part of your Mobile HF radio installation, but it is also the most performance-sensitive.
Measure carefully. Confirm alignment. Tighten hardware properly.
And yes, drilling into a new bar can feel nerve-wracking — but a secure mount elevates your entire Mobile HF radio installation.
Coax Routing: Where Patience Pays Off
Routing coax in a Mobile HF radio installation often requires creativity.
Avoid:
- Sharp bends
- Running coax alongside high-current power cables
- Pinching coax under seat rails
- Forcing cables through tight gaps
Protect exposed sections with conduit. Secure runs with proper clips.
A neat coax layout improves reliability and makes future troubleshooting easier.
A rushed coax run undermines an otherwise well-planned Mobile HF radio installation.
Control Head Placement: Comfort and Safety Matter
In modern radios, the control head can be mounted separately from the radio body. During your Mobile HF radio installation, choose a position that balances visibility and safety.
Mount the control head where:
- You can see it clearly without straining
- It does not obstruct airbags
- It does not interfere with driving controls
- It is within easy reach
Your Mobile HF radio installation should enhance your vehicle, not create distractions.
Managing Electrical Noise
Electrical noise is one of the most common complaints after a Mobile HF radio installation.
Alternators, injectors, LED drivers and DC-DC chargers all introduce potential interference.
If your Mobile HF radio installation produces unwanted noise:
- Re-check grounding
- Inspect bonding straps
- Ensure proper cable separation
- Confirm antenna mount grounding
Noise problems often originate from installation details, not faulty equipment.
Testing Before Reassembly
Before replacing interior panels and declaring your Mobile HF radio installation complete, test thoroughly.
Check:
- SWR on multiple bands
- Voltage stability during transmit
- Real-world contacts
- Noise levels at idle and revving
Testing validates your Mobile HF radio installation and reveals issues early.
It is much easier to correct wiring before trim panels go back in place.
The Emotional Journey of Mobile HF Radio Installation
A Mobile HF radio installation often includes moments of doubt.
There will be a stage where cables seem endless. There will be frustration when trim clips refuse to cooperate.
But the turning point comes when your Mobile HF radio installation powers on, SWR is stable, and your first contact comes through clearly.
That moment makes every scraped knuckle worthwhile.
Final Thoughts on Mobile HF Radio Installation
A Mobile HF radio installation is not an afternoon shortcut project. It is a structured upgrade that rewards careful execution.
Plan thoroughly. Ground properly. Route neatly. Test carefully.
If you treat your Mobile HF radio installation as a deliberate build rather than a rushed task, you will finish with both your sanity intact and a vehicle that communicates confidently beyond mobile coverage.
And when you are parked in a remote part of Australia, making solid contacts far beyond phone signal range, you will know your Mobile HF radio installation was worth every step.
Get Everything You Need for Your Mobile HF Radio Installation
If you are planning your own Mobile HF radio installation, having the right equipment and advice makes all the difference.
The team at Satellite World Store specialises in HF communication systems, antennas, installation accessories and expert guidance for Australian vehicle owners and off-road travellers.
Whether you are setting up your first system or upgrading an existing setup, Satellite World Store provides trusted products and support to help your Mobile HF radio installation perform reliably wherever your journey takes you.
Visit Satellite World Store today and build a communication system that keeps you connected far beyond mobile coverage.